Whether Kit created the post or you did it yourself using the content wizard, this guide will walk you through how to upload your blog—and make sure it’s fully optimised for SEO. From keywords and formatting to titles and images, here’s everything you need to know to publish a polished, search-ready post.
When you sign up to Hike, our SEO agent Kit gets to work by creating a personalised monthly blog strategy just for you. This Blog Strategy outlines the blog topics that will be written over the coming months (typically one post per month). Each blog strategy includes:
- Blog titles and short descriptions
- Target keywords
- Questions the blog post will answer
The plan is based on a mix of keyword research, “People Also Ask” questions, seasonal trends, and insights from your industry.
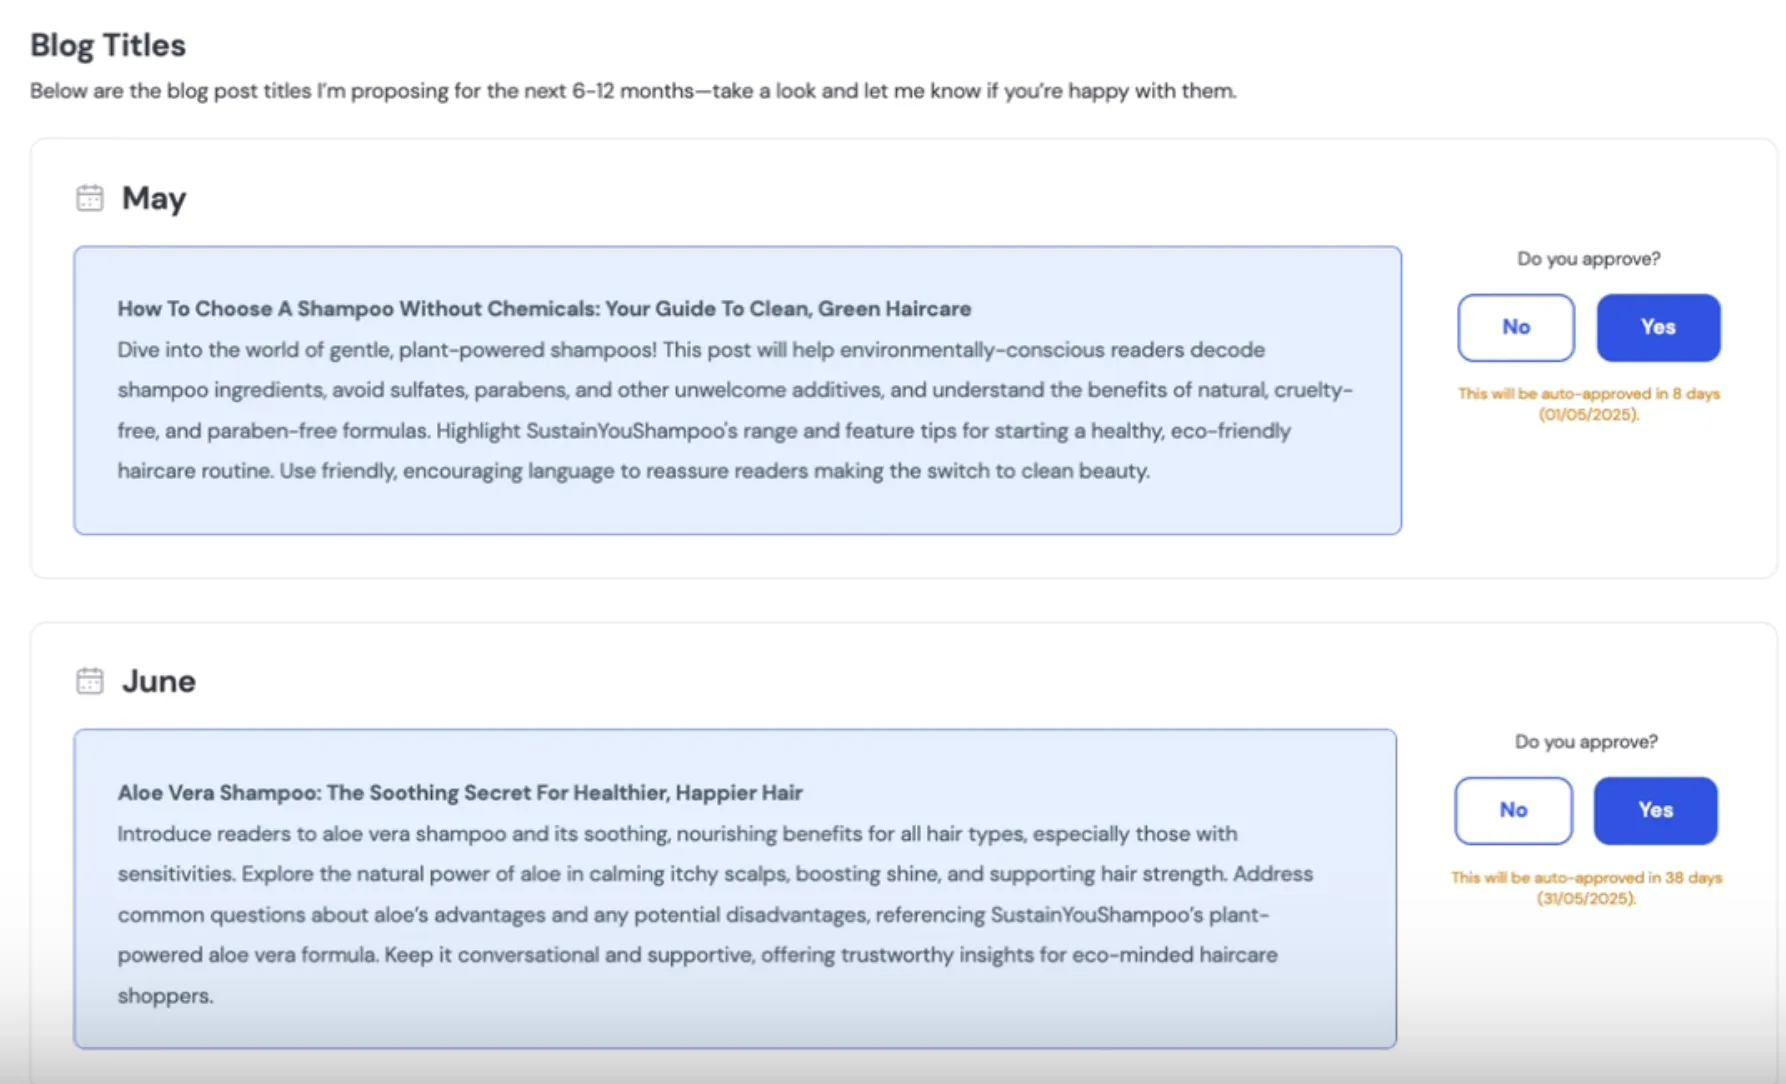
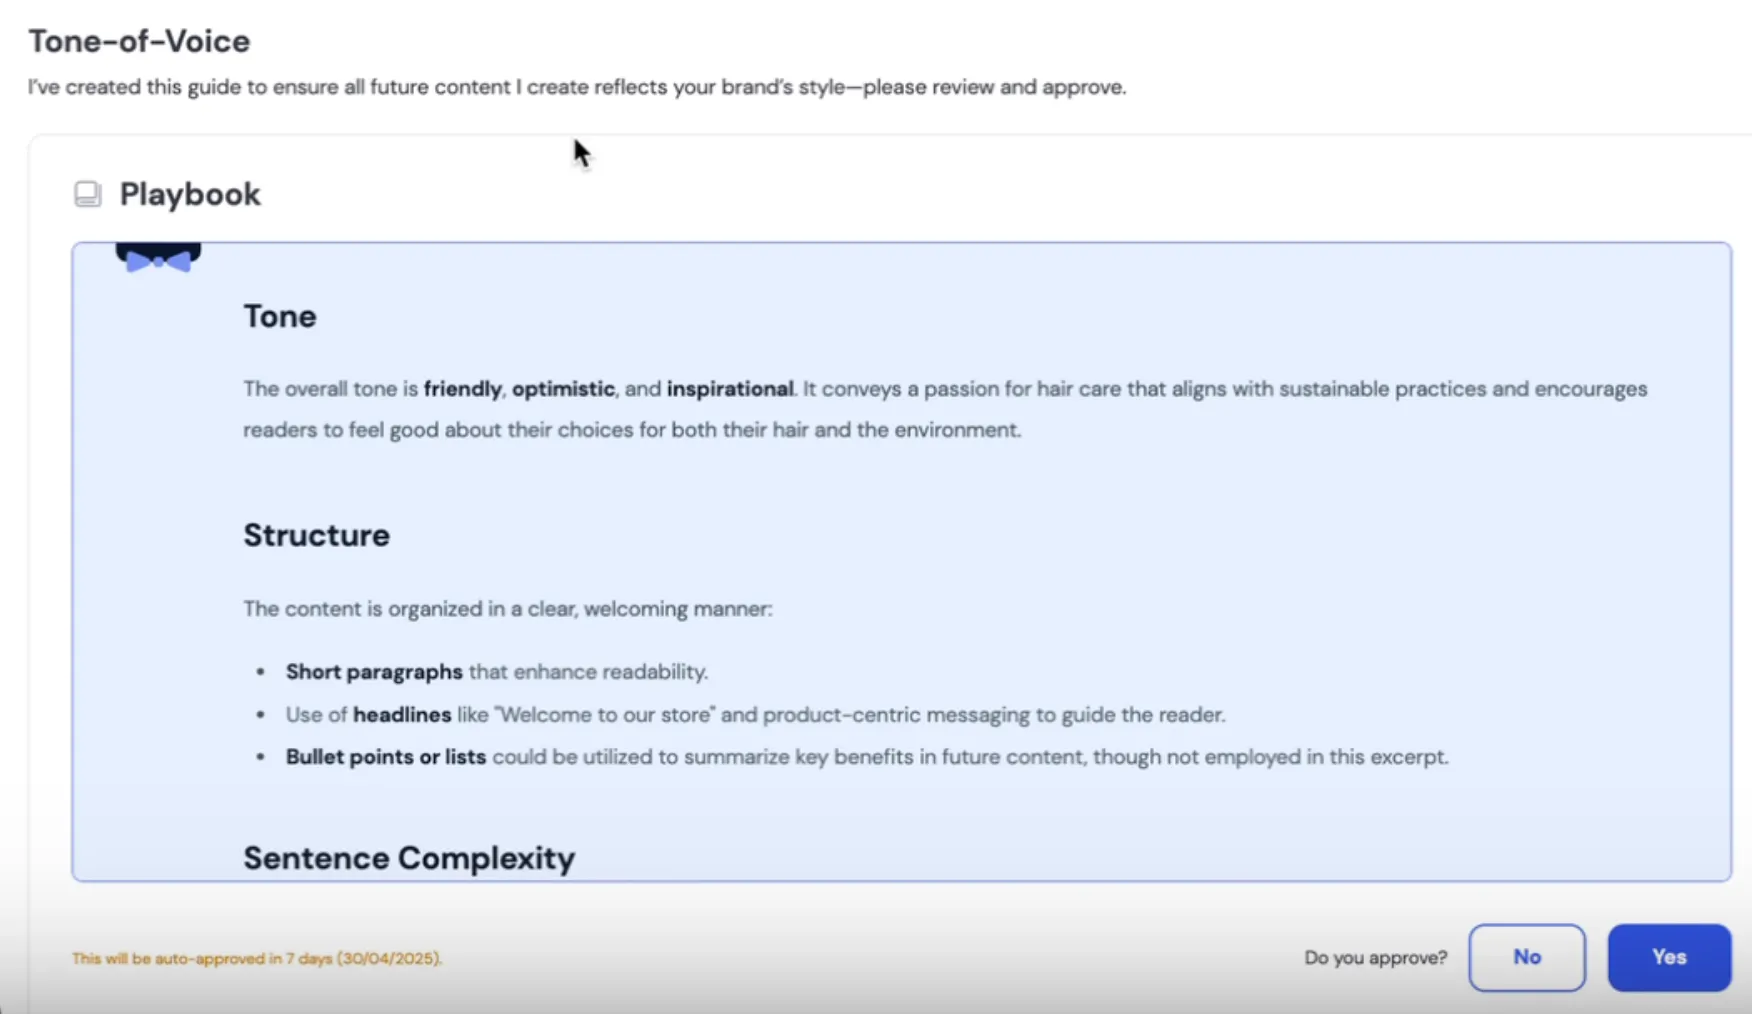
Once you approve the strategy, Kit will start writing your monthly blog posts. Kit also creates a Tone of Voice Playbook, which ensures the writing style matches your brand. If you'd like to make changes to either the blog strategy or the tone of voice, you can do this easily through the Approval Centre by clicking “no” and leaving feedback.
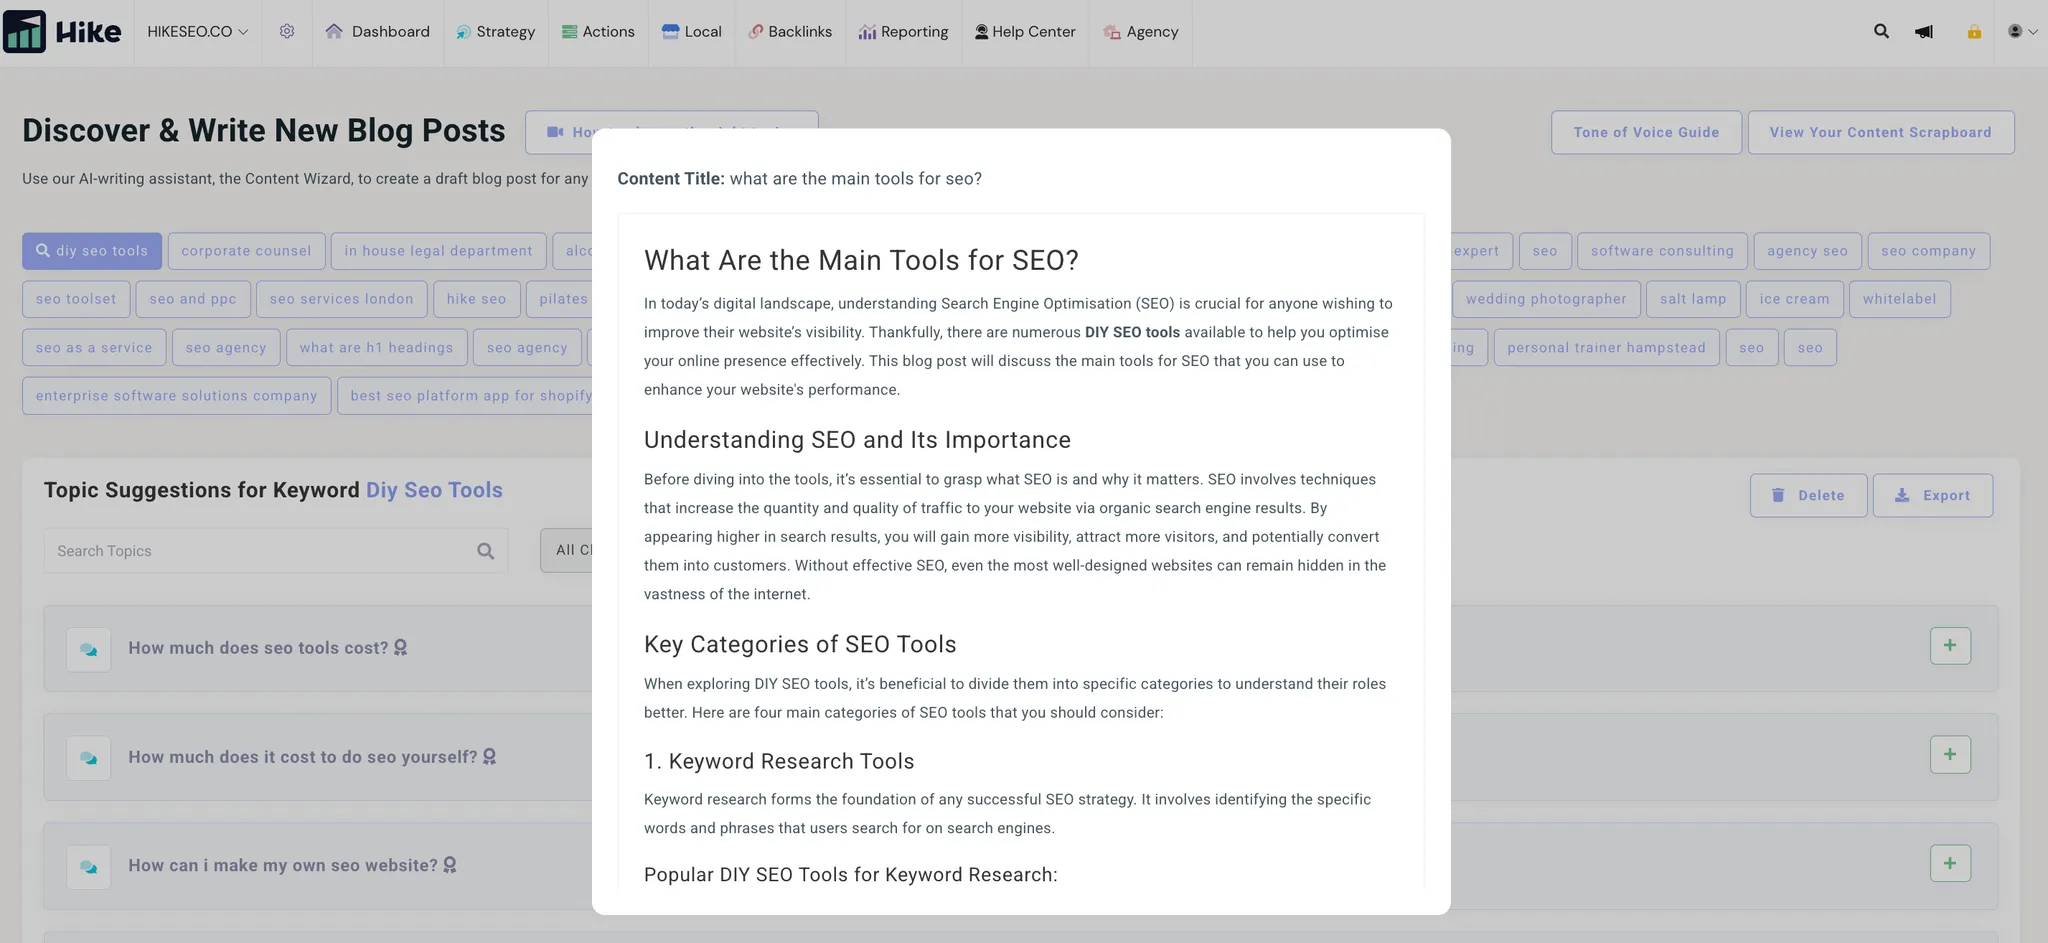
There’s also a second way to create blog content. You can go to Strategy > Content Strategy, suggest a blog topic, and add it to your Scrapboard. From there, just click the content wizard icon next to your topic, and the platform will generate a blog post of up to 700 words. You can re-run the content if you're not happy with the first version—but keep in mind that this method may need a bit of tweaking to match your tone and may require extra optimisation (more on that below).
How to Optimise a Blog Post
When your blog post is created by Kit, it’s already written and optimised for your business. Kit uses your keywords and writes in your brand’s tone of voice, so most of the time, you won’t need to make any changes at all.
_(1)_(2).webp)
But if you'd like to tweak your blog post, you can! Just head to the Approval Centre and click “No” next to “Do you approve?”. This gives you a chance to leave feedback and ask Kit to make updates. You’ll also receive your blog post as a PDF via email, so you can make your own edits before uploading it.
Here are some simple tips to help you optimise your blog post further:
Include Your Keyword Naturally
Use your main keyword a few times in the blog, but make sure it sounds natural. Don’t overuse it—Google doesn’t like that!
Add Internal Links
Adding Internal links to other pages on your website using relevant keywords. This helps keep readers on your site longer. You can see which keywords link to which pages by going to Strategy > Keyword Sitemap.
Include External Links to Reputable Sources
If you mention stats or research, link to the original source. This helps show your blog is trustworthy and well-researched.
Add Images
Images help bring your blog to life! While Kit doesn’t include images in blog posts, you can easily add them yourself. Want to learn more about image SEO? Check out this guide.
Optimise Your Meta Description and Title Tag
If you’re using Kit, these will be created for you once you upload your blog post. But if not, here’s what to keep in mind:
Meta Description Tips
- Write a short summary (155–160 characters)
- Make it interesting and include your keyword
- Think of it as your blog’s ad in search results
Title Tag Tips
- Keep it between 55–70 characters
- Include your main keyword (put it at the beginning if possible)
- Make sure it clearly describes what the blog is about
Final Tip: Make It Easy to Read
Before publishing, check for spelling and grammar mistakes. Use short paragraphs, bullet points, and bold text to make your blog easy to scan and enjoy!
How to Upload a Blog Post
Once your blog post is ready—whether it was written by you or created by Kit—it’s time to upload it to your website. Here’s a simple step-by-step guide to help you do it.
1. Log in to your website
Go to the admin area of your website. This is sometimes called your "dashboard."
If you’re using WordPress, Wix, Squarespace, Shopify, or another website builder, log in with your usual details.
2. Find your blog or posts section
Look for a menu item called “Posts”, “Blog”, or “Articles”.
Click “Add New” or “Create Post” to start a new blog post.
3. Copy and paste your blog content
Open the PDF that Kit sent you with your finished blog post. Then:
- Copy the content from the PDF
- Paste it into the main text area (editor) on your website
- Try to keep the formatting (like bold text, bullet points, and headings) the same so it’s easy to read
How to keep the formatting neat when copying from the PDF
If copying directly from the PDF looks messy, try this:
- Upload the PDF to Google Drive
- Open it with Google Docs
- Then download it as a Word document
- Copy and paste from the Word doc instead
This usually keeps things cleaner!
4. Add a blog title
Use the title Kit provided or write your own.
Make sure it includes your main keyword and clearly describes what the blog is about.
5. Add images (optional but recommended)
Images make your blog more engaging.
To add an image:
- Click “Add Image” in your editor
- Upload your image
- Add alt text (a short description of the image). This helps with accessibility and SEO
6. Set your meta title and description
If your website builder allows it (like WordPress with a plugin), you can add:
- Meta title – usually the same as your blog title, with your keyword included
- Meta description – a short summary (about 155–160 characters) that encourages people to click on your blog in search results
7. Choose a category and tags
Help organise your blog by selecting a category (e.g. “Tips” or “Guides”)
Add tags or keywords that relate to the topic so readers (and search engines) can find it easily.
8. Preview your blog post
Before you publish, click Preview.
Check for spelling mistakes, broken links, or any formatting that looks off.
9. Publish your blog
Once everything looks good, hit “Publish” or “Post”—and your blog is live!
10. Let Kit take it from here
If you're using Kit, it will automatically review and optimise your blog post once it’s uploaded to your website.
Not sure how to upload on your platform?
Here are helpful guides for the most common website builders:
Still stuck? Reach out to your web developer or CMS support team.
Our team is happy to guide you—but please note, we can’t upload the blog post for you.
Wrapping Up
With Kit, creating and managing your blog posts is simple. From planning and writing to optimisation, Kit handles the heavy lifting—so you can focus on growing your business.
Once your post is uploaded, Kit will take care of final SEO tweaks. And if you're unsure how to upload, the platform guides above can help.
Need a hand? We're happy to point you in the right direction, reach out via our live chat!
About the author
Sophie Franklin


.webp)